Overview
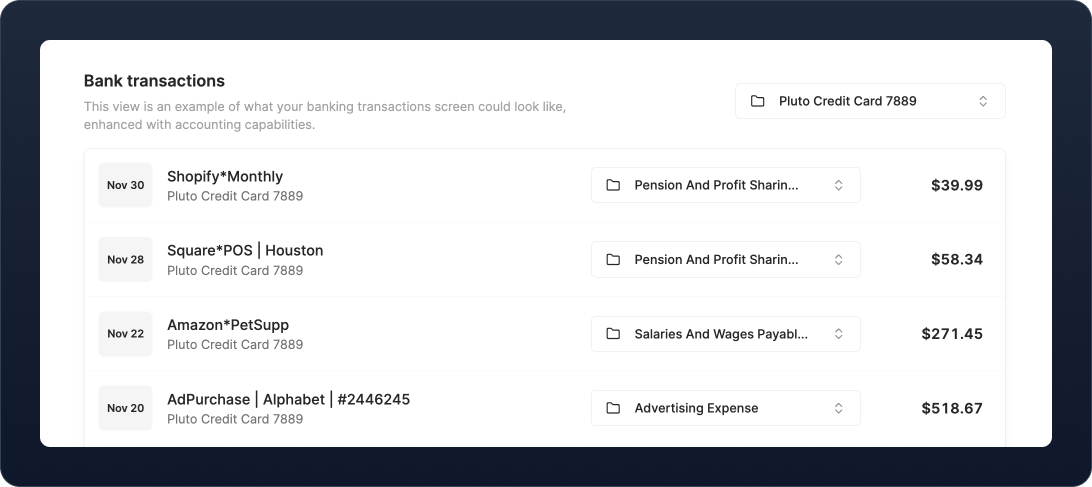
A transactions page provides a simplified accounting view of a user’s accounts mixed in with their accounting data. It can provide a bank-like interface for users to perform simple accounting tasks such as viewing, categorizing, and reviewing a single account’s worth of information. A transaction page should allow the user to:- Select an account to view.
- List the transactions to that account in chronological order.
- See the category of the transaction.
How it works
After a transaction has been posted to a financial account, it is processed by your bank integration, Plaid or Unit, for example. Your data integration imports the transaction into Teal where it goes through our transaction submission pipeline and is categorized. A journal entry is created for the transaction, with one line entry recorded to the financial account ledger and the other to the ledger it was categorized as. The Transactions endpoints allow you to access all Transactions for a given financial account. It’s important to understand that a Transaction in Teal is an abstraction of a the journal entry and line entry created by the transaction submission pipeline:- The Transaction’s description is the same as the parent journal entry’s.
- The Transaction’s category is the ledger of the opposing line entry. Consequently, re-categorizing a Transaction changes the ledger of the opposing line entry. A Transaction’s line entry can never be moved out of its financial account ledger.
- A Transaction’s amount is the same as the line entry in the financial account ledger.
- For a Transaction to have multiple categories, you must create multiple line entries in the journal entry.
Prerequisites
You can build a transaction page for any Instance, provided their financial accounts are mapped to ledgers and you are creating transactions, manually or via a data-integration.Steps
1. Get transaction source accounts
To retrieve an Instance’s Transactions, we need to first get all transaction source accounts. Use the/v0/source-accounts endpoint.
Map the result into a <select> element to allow the user to select which account they want to see transactions from.
2. Display the Transactions
Use/v0/source-accounts/{source_account_id}/transactions with the selected transaction source account id as the source_account_id parameter. Use the records attribute from the response to display the transaction data to the user.
/v0/source-accounts/{source_account_id}/transactions?expand=ledger,opposing_line_entries to get the required information.
If you are building a separate transaction review section, you can display only reviewed transactions by calling /v0/source-accounts/{source_account_id}/transactions?review_status=reviewed instead.
3. Further enhancements and considerations
Depending on your use case, consider adding features such as date filters, tagging, or categorization reviewing.Best practices
- Only display one account’s Transactions at a time. This helps prevent confusion when reviewing transactions.
- Use pagination to keep your application fast and performant or virtualized lists for an infinite scroll experience.
- Be aware of the differences between credit accounts and debit accounts and how you represent transaction amounts of each to users. Money spent from debit accounts is negative (money is leaving the account), whereas money spent on credit accounts is positive (credit is accruing on the account).
- Think about how you want to display accounting data such as categories or tags alongside banking data. Ensure there is a clear hierarchy of information.
- Keep the focus of the page on displaying the account’s transaction data. If you need to perform complex accounting actions, such as splitting a journal entry, use a modal or navigate the user to a new screen.
Relevant resources
Guides
- Mapping ledgers
- Build a Review transactions flow
- Data integrations